How to Install a WordPress Theme (Complete Guide)

Are you ready to install a WordPress theme?
Because you are here reading this post, it’s likely that you’ve already selected a WordPress theme for your new website. If not, see my guide: how to choose a WordPress theme.
Installing a WordPress theme is not difficult to do at all, but the way you install a free theme is different from the way you install a premium theme – and there are a few different ways to install both free and premium themes.
In today’s post, I will show you how to install a WordPress theme, step by step. You will learn four different methods, so you can choose the one that works best for you.
Are you ready? Let’s get started.
Before Installing a WordPress Theme
Before installing a WordPress theme there are two important things that you need to know.
First …
A mistake I see many beginners make is choosing a WordPress theme based on design only because they want their new website to look good, and I get that.
However. Your theme is more than just the face of your website. It plays a pivotal role in SEO, user experience, and conversion rates. So it’s important to choose a WordPress theme carefully.
If you already know what makes a good WordPress theme and you’ve done your research before selecting a theme to make sure it ticks all the boxes, then you’re ready to follow the steps in this article.
But if that’s not the case and you just selected a theme because it looks good without considering other important factors, read my guide, it will help you install a theme that sets your website up for success.
Secondly …
The installation methods in this guide only work for a self-hosted WordPress.org website, not WordPress.com. If you’re using WordPress.com, you’ll need to follow the steps in this guide.
Now, let’s take a look at how to install a WordPress theme on your website.
How to Install a Free WordPress Theme
As I mentioned above, there are a few different ways to install a free WordPress theme, but the easiest way is to use the theme search functionality in WordPress. I will show you this method first and then, we’ll take a look at the other more advanced methods later in this article.
To get started, from your WordPress dashboard go to Appearance >> Themes and click on the WordPress.org Themes button.

On the next screen, if you already know the name of the free theme that you want to install, you can use the search theme function in the top right corner to go straight to it. In this example, I searched for the free Astra theme.

Alternatively, if you don’t have a specific free theme in mind, you can filter the results by:
- Featured
- Popular
- Latest
- Favorites

Or you can search for a free WordPress theme with specific features using the Feature Filter options:

Whether you enter the name of a specific free theme or use the feature or feature filter options, you will see a list of themes that met your requirements.
To preview, install, or see more details about any one of the themes in the list, simply hover your mouse over the theme screenshot to bring up those options.

When you have selected a theme that you like in the WordPress theme directory, go ahead and click on the Install button. Wait a few seconds and you will see the option to Activate or Preview the theme on your website.

Before activating the theme you may want to preview it first to see what it looks like. After that, If you like what you see, click Activate. And that’s it. You are now ready to configure the theme settings, upload a logo image, and start publishing content.
How to Install a Premium WordPress Theme
If you want to install a custom theme, or you have purchased a premium theme, you’ll need to install the theme using the upload method.
First, download the .zip file of the theme you have purchased and save it to your computer.
Then, from your WordPress admin dashboard, go to Appearance >> Themes and click on the Upload button:

On the next screen, click the Upload button at the top. This will open a new option to browse and upload the premium theme .zip file you have downloaded. Click the Browse button. Select the theme file and click the Install Now button to upload it.

Wait a few seconds for WordPress to upload the file. Upon completion, you’ll see a success message with links to live Preview the theme or activate it.

Finally, click the Activate link and that’s it! You are ready to configure the theme settings to duplicate the look of the theme demo site. Follow the step by step documentation provided by the theme developer to make that happen.
How to Install WordPress Themes Manually
At the beginning of this guide, I told you that there are a few different ways to install free themes and premium WordPress themes.
The methods we’ve covered already are the easiest ones, and if you are a beginner, or you are not a techie, they are the methods you’ll want to use.
If however, you’re feeling a little adventurous and you want to learn more advanced ways to install a WordPress theme, I will show you how to install themes manually using cPanel and FTP.
To get prepared, you need to download the file of the free, premium, or custom WordPress theme you are installing. Save it on your desktop and unzip it. In the image below, I have downloaded and unzipped the Genesis Maker Pro theme from StudioPress.

When you have downloaded and unzipped your chosen theme file, follow the steps in the cPanel or FTP tutorial (or both) below to learn how to install a WordPress theme manually.
Note: if you are installing a complex theme with large files, it might be too big to upload using cPanel. In which case, you’ll need to upload it with FTP instead.
Install a Theme With cPanel
To install a WordPress theme using cPanel, you need to log in to your web hostings control panel (aka cPanel). Go to Files and click the File Manager link to open it.

Once open, you’ll need to go to the themes folder of your WordPress installation. For most people who only have one website installed on their server that is located at public_html (double click to open it):

Then wp-content (double click to open it):

Then themes (double click to open it):

Inside the themes folder, you’ll see a list of WordPress themes currently installed on your website. To install a new theme, first, you need to upload the theme .zip file. Click the Upload button:

On the next screen, click the Select File button:

Open the .zip file of your free or premium WordPress theme:

When the file is uploaded, you will see a success message saying the upload is complete. Click the Go Back to link:

You’ll now see the file you just uploaded in the list of installed themes. You need to extract it.
To do that, Select the file by clicking it once. Then click the Extract button at the top of the screen. Click Extract Files:

Now click Close:

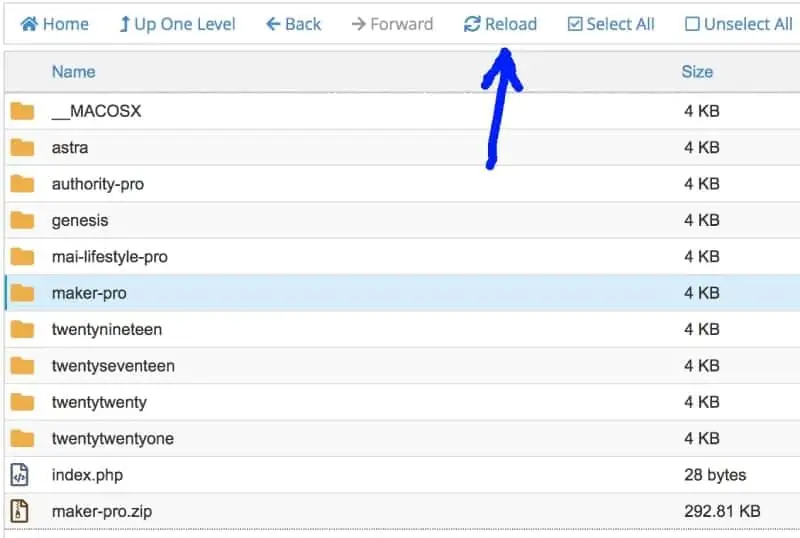
The file is now extracted and you will see the new theme folder added to the list of installed themes. If you don’t see it, just click the reload button to refresh the list:
Now, before you can activate the theme on your website, you should delete the .zip file from your server. Click the file once to select it. Click the Delete button:

Next, log into your WordPress website. Go to Appearance >> Themes. Hover over the screenshot of the WordPress theme you just uploaded using cPanel. Click the Activate button:

And that’s it. All that’s left to do now is configure your new theme settings to duplicate the look of the theme demo.
Install a Theme With FTP
FTP stands for file transfer protocol. To install a WordPress theme manually using FTP we are going to use an FTP client called FileZilla. It is a free tool used to transfer files from your computer to the server where your website is hosted.
This method comes with pros and cons. The con is that compared to cPanel it takes longer to upload files using FTP. The pro is that unlike cPanel there is no file size limit.
Note: If you haven’t done so already, first you need to download the theme file and unzip it. Save it on your desktop for easy access.
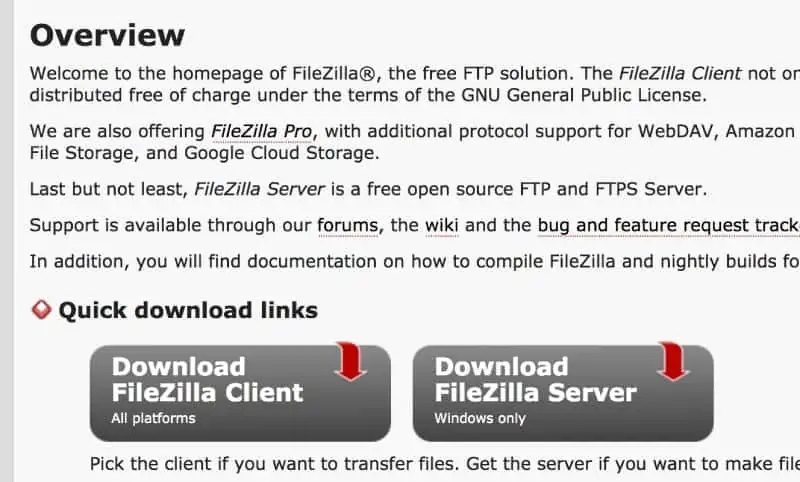
Step 1: Download FileZilla
FileZilla works on Windows, Mac, and Linux. You can download the software here. Click the Download FileZilla Client button to get started:
Whether you are on a Mac, Windows, or Linux, on the next screen, click the show additional download options link:

From the list of options, click the download link for the system you are using and then follow the prompts to install FileZilla:

Upon completion, open FileZilla. It will look like this:

Leave the FTP client open and move on to step 2 below.
Step 2: Create an FTP Account
To connect FileZilla to the server where your WordPress website is hosted, you’ll need FTP credentials.
This includes:
- Hostname
- Username
- Password
- Port
Some web hosts create an FTP account for you when you sign up for hosting with them, but some don’t. In this case, you’ll need to create an FTP account inside cPanel.
I will show you how to create one inside Bluehost. With most web hosts, the process is the same, but if you’re using another host and get stuck, reach out to them for help.
Login to Bluehost and go to the Advanced tab. That’ll take you to cPanel. In the Files section, click the FTP Accounts link:

On the next screen, enter a name, choose a domain name if you have more than one, add a password, set the quota to unlimited if that’s an option for you, and make the directory path public_html. Click the Create FTP Account button:

Next, scroll down the page slightly until you see the FTP account you just created. Click the Configure FTP Client link to see your FTP credentials.
Step 3: Connect FileZilla to Your Server
Now enter your FTP credentials into FileZilla at the top of the screen and click the QuickConnect button. Once connected, on the right side (remote site) of FileZilla, you will see a list of folders and files installed on your WordPress website’s server.
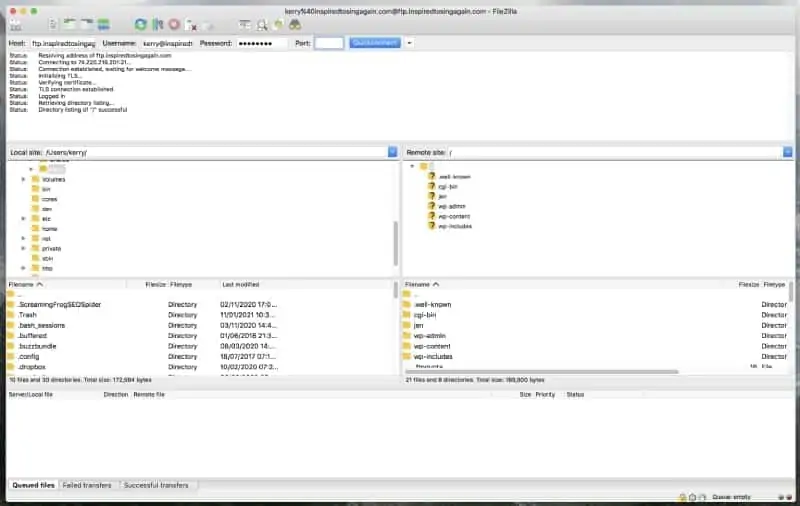
On the left side, are all the files and folders on your computer or laptop. In the next step, we will use FileZilla to upload your theme files from your computer to your server.
Step 4: Upload Theme Folder to Your Website
To upload the theme, first, on the left side of FileZilla under Filename, find a folder called Desktop and double click to open it up. Inside the folder, you’ll see a list of all the files and folders saved on your desktop. Navigate to the folder of the theme you downloaded and unzipped.
Now, on the right side of FileZilla under Filename, find the wp-content folder. Double click it to open it up. Then find the themes folder and double click to open that folder.
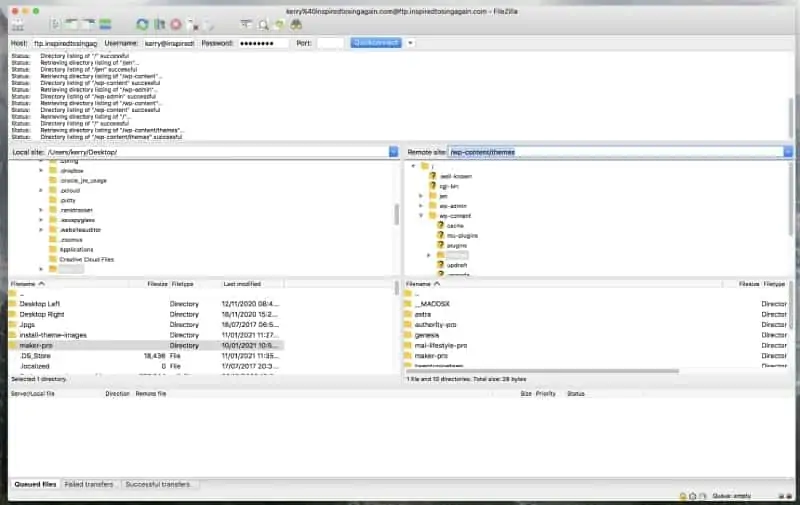
Note: depending on how your FTP account is set up, you may need to open the public_html folder before wp-content/themes.
When you see your theme folder on the left side of FileZilla and you have opened up the WordPress theme folder on the right side, as seen in the image above …
Left-click the theme folder (on the left) to select it, hold down the control key on your keyboard, and click it with your mouse. You will see some menu options. Click Upload:

The theme folder will now begin uploading from your computer to your server. You will see the files uploading in the bottom section of FileZilla. If you see a message saying some files already exist, select overwrite and always use this action. Click okay:

When the files have finished uploading to your website server, you will see the theme folder on the right side of FileZilla.
Step 5: Activate the Theme on Your WordPress Site
Lastly, log in to your WordPress dashboard and go to Themes. You will see that the uploaded theme is now in the list of installed themes. Hover your mouse over the theme screenshot and click Activate.
Summary
After installing WordPress, the next step towards starting a blog is to install a theme on your website, and as you’ve learned in this guide, there are several different ways to do this – some of which are easier than others.
You can:
- Install free themes using the theme search functionality built-in to WordPress.
- Install premium WordPress themes using the upload themes feature.
- Use cPanel to upload and extract a theme zip file. Then log in to your WordPress dashboard and activate it.
- Similar to cPanel but a little more advanced, you can use FTP software like Filezilla to upload the theme and activate it inside your WordPress dashboard.
I hope you found this WordPress tutorial helpful. If you did, please share it on social media using the buttons below.