How to Change Link Color in WordPress On Any Theme

Don’t like the color of links on your WordPress website?
There’s an easy fix for that!
In this article, I will show you how to change link color in WordPress step by step.
First though …
If you haven’t done so already, we need to find the hex code of the new link color you want on your website.
Not just one color, but three.
- One for normal links
- One for hover & active links
- One for visited links
What’s a hex code? It’s a six digit HTML code that tells the browser what color the link should be. For example …
- Black is: #000000
- White is: #ffffff
- Bright red is: #ff0000
- Blue is: #0000ff
And just in case you’re wondering what HTML code is, it’s a special computer language used to create webpages.
Let’s go find your HTML color hex code now. 🙂
Find The New Link Color Code
To find the six-digit code for links on your website, visit HTML Color Codes.
In the HTML color chart click a color to auto-generate the hex code for you.
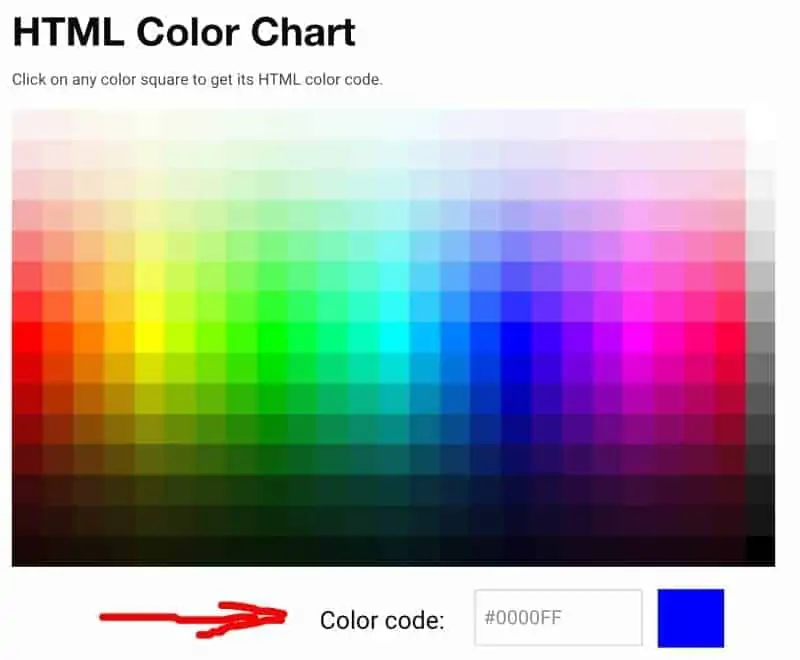
If you don’t like any of the colors in the chart, use the HTML color picker instead to use a custom color that compliments the colors of your website.

Upon completion copy and paste the HTML color hex code onto a notepad document and save it, or just write it down, whichever works best for you.
Then, do the same to find color codes for active, hover, and visited links.
Changing the Color of Links in WordPress
Now that you know the hex code for the different types of links on your website, I will show you how to change link color in WordPress.
Login to WordPress. Go to Appearance >> Customize >> Additional CSS.

To change the color of links, we need to add some CSS code to the Additional CSS content area as seen in the image above.
Change the Default Link Color
To change the color of default links, or what I call normal links, add the code below and replace my hex code with your own.
a {
color: #1032cb;
}
Next, if you have WordPress caching enabled, clear it. Then visit your blog. All default links will be a different color. And that’s it. Easy.
Change Link Hover Color & Visited Links
The CSS code to change the hover and visited link color is:
a: hover {
color: #3252e0;
}

a:visited {
color: #333333;
}
Again, if your site is cached, clear it. Then visit the site to see the changes.
Change the Color of Active Links
The CSS code for active links is similar to the code for hover and visited links. We just replace hover and visited with the word active. Like this …
a:active {
color: #333333;
}
That’s it! You have successfully changed the color of links on your WordPress site.
If the steps above worked for you, let me know in the comments box below. 🙂
More Ways to Change Link Colors
Like most things with WordPress, there are other ways to change link colors. However, using CSS is the best method in my experience.
The other methods I am about to share with you don’t work with every WordPress theme, and they don’t change all of the link colors (visited, active, hover)
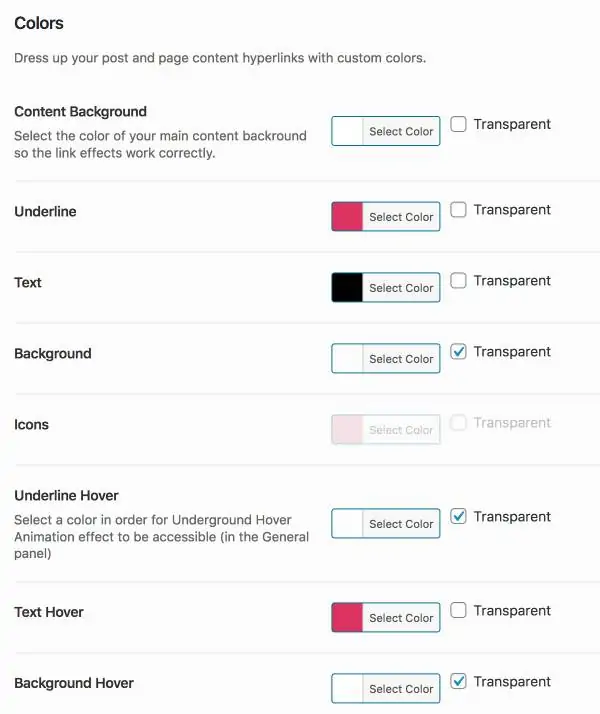
1. The Theme Customizer
Some premium WordPress themes give you the option to change link colors using the theme customizer, like this …

The theme customizer seen in the image above belongs to GeneratePress and as you can see, you can change the color of default, hover, and visited links. But not active.
2. WordPress Post Editor
You can change the color of a text link using the Classic or Gutenberg WordPress post editor, but it is VERY limited.
It only works on a post-by-post or page-by-page basis. Meaning, you cannot use the post editor to change link colors globally.
And as seen in the image below, you can only change the default link color.
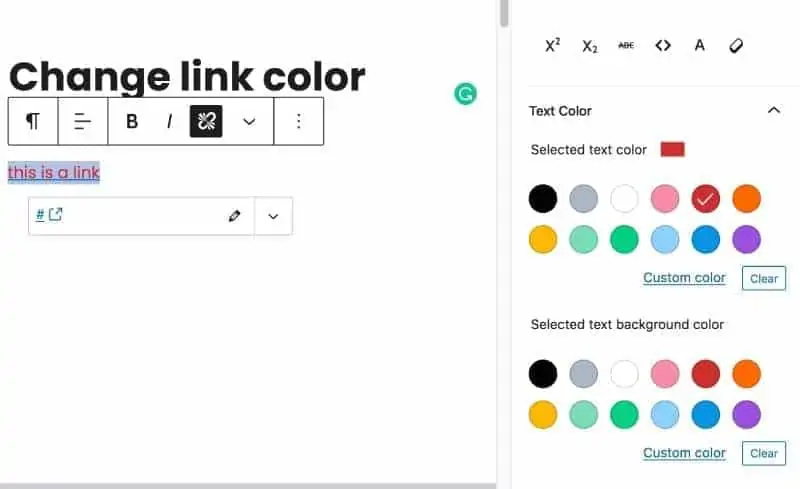
If all you are looking to do is change the color of one or two default links in a single blog post, or on a single page, then this method works okay.
But if you want to change the color of links across your entire website, including hover links, visited links, and active links …
You’ll need to use CSS code instead. Or the theme customizer if possible.
3. Use a WordPress Plugin
You can change the color of default and hover links using a plugin called Stylish Links.
The plugin is really easy to use. You simply install and active it. See my guide on how to install WordPress plugins for help with that.
Once activated, go to Stylish Links >> Colors
On the settings page, add the hex code for hover and default links. Once saved, the colors will be applied to links globally. But those are the only links you can change.
I hope this article has helped you learn how to change link color in WordPress. You might also like: